How to Link Squarespace and Thinkific in 3 Easy Steps (2026)

Passive income is a big thing at the moment. With a little bit of upfront effort, you can earn money while you sleep!
If you have expertise in a particular area, an online course is a great way to make passive income. You create your course, make it available on your website, and charge people to access it.
An easy way to do this on your Squarespace site is through Thinkific. Thinkific is an online platform on which you can host courses and offer one-to-one coaching. And the great thing is, it doesn’t take a cut of your sales!
You can easily integrate Squarespace and Thinkific so your website visitors can access your courses directly from your Squarespace site. Here’s how to do it in three simple steps.
Step 1: Add your course to Thinkific
The first step is to create a Thinkific account and add the products you want to sell. There are a range of pricing plans, as well as a free account that lets you create one course.

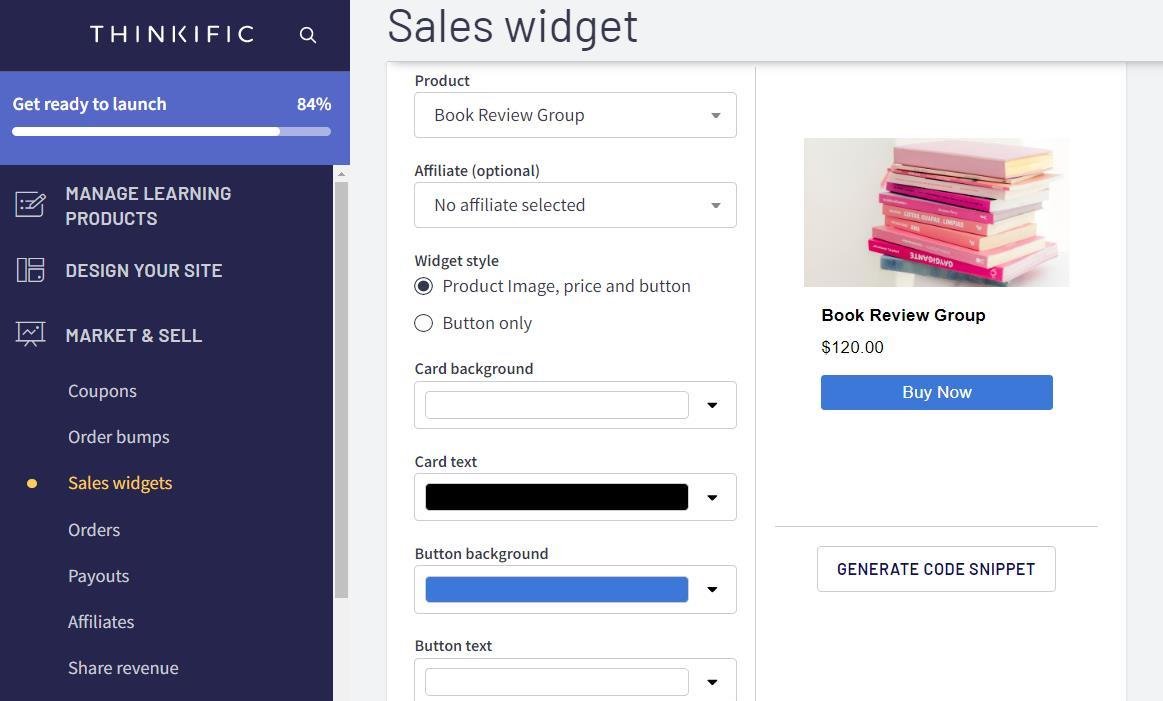
Step 2: Create a sales widget
When your Thinkific site is ready, you need to create a sales widget. This is a snippet of HTML code that you’ll embed in your Squarespace site.
Go to the Market & Sell section of your Thinkific account and click Sales widgets. Here you’ll be able to choose the product you want to promote and style it to match the branding of your Squarespace site.
When you’re happy with how your sales widget looks, click Generate Code Snippet. Click Copy Snippet to grab your code.
Step 3: Add your sales widget to Squarespace
Decide where you want to add your sales widget to your Squarespace site. This can be a brand-new page or a section of an existing page.
Go into edit mode and select Add Block where you want to add your sales widget. Choose the Code block and click on the pencil icon to edit. Paste your code into the block and preview it to make sure the sales widget looks right.
And that’s all there is to it! You’ve successfully integrated Squarespace and Thinkific together!
Extra tip: You can also explore DropinBlog for Thinkific to elevate your course website. With DropinBlog, seamlessly integrate a blog section into your Thinkific site and amplify traffic and engagement for your online courses.

Bonus tip: How to add your Thinkific link to your navigation bar
If you want to give your visitors an extra way to access your Thinkific content, why not add a link to your Thinkific site in your navigation bar?
While you’d typically use a navigation bar to direct visitors around your site, you can use it to point to external websites too. Here’s how add a link:
Go to the Home menu and click Pages
Go to the Main Navigation section at the top of the menu and click the Plus (+) sign
Select Link from the bottom of the menu
Add the title of your link as it will be displayed in the navigation bar and the URL of your Thinkify account
Click the Cog and toggle Open in New Window. This means people can still access your Squarespace site even if they click on the link. Click Save
Click Save again, and your navigation bar will automatically refresh to show the new link
Thinkific is brilliant if you want to make money and share your experience with others. By adding it to your Squarespace site, you make it easy for your site visitors to check out the courses you offer.