How to Add a Blog Post Banner Image in Squarespace (2026)

Blog posts are brilliant for showing off your expertise and getting your business noticed in the search engines.
However, you need to wow your readers with a strong introduction if you want them to read all the way through to the end.
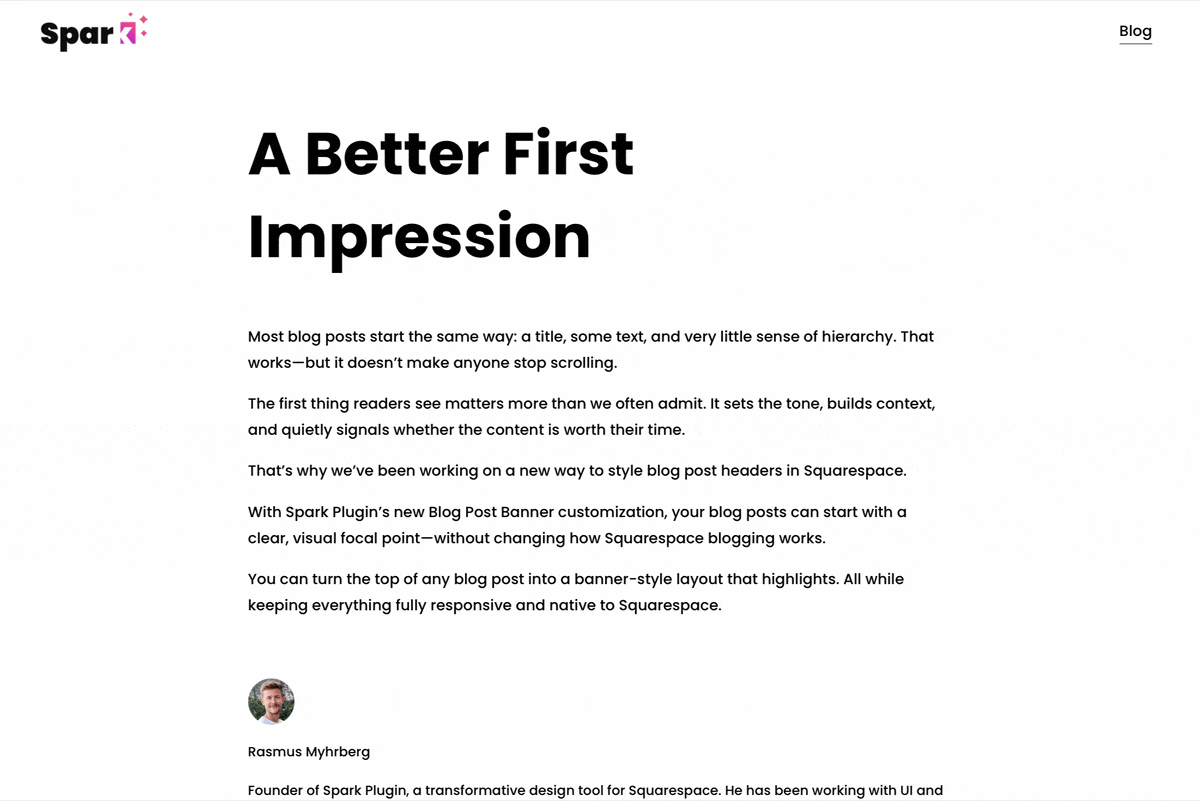
A Squarespace blog post banner customization adds an eye-catching image or color block to your article, encouraging people to keep reading!
Here’s how to add a fully customizable Squarespace blog post banner image with Spark Plugin.
Add a Squarespace blog post banner in three easy steps
Step #1: Install Spark Plugin
(If you’ve already installed Spark Plugin on your website, you can skip this step!)
When you sign up for Spark Plugin, you’ll receive a snippet of code that’s unique to you.
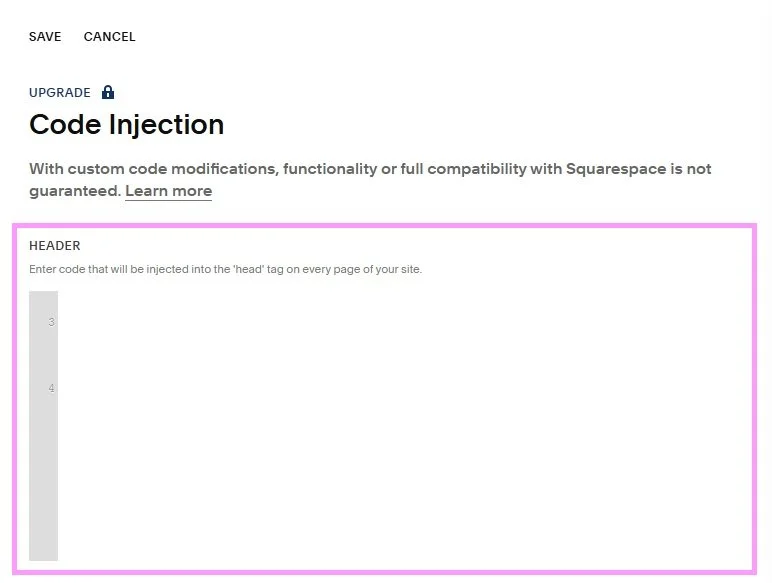
Go to Pages and scroll down to the bottom of the menu. Click on Code Injection and paste this code into the HEADER box. Click SAVE when you’re done.

You’ll see a small pink ‘K’ icon in the top right-hand corner of your Squarespace site. If you can’t see it, log out of your website and log in again.
Step #2: Add your Squarespace blog post banner image
While you can add a blog post banner image from any page on your site, we recommend adding it from a blog post so you can quickly check any changes you make.
Go to a blog post page and click the pink ‘K’ icon to access the Spark Plugin menu.
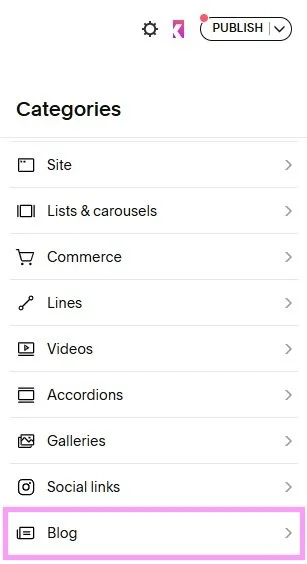
Click on Blog at the bottom of the main menu.
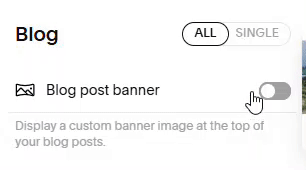
In the Blog menu, toggle Blog post banner from off to on.
After a few seconds, Spark Plugin will add a banner to the top of your blog post!
Step #3: Customize your banner
The great thing about the Squarespace blog post banner customization is that you can amend it to suit your needs. When you turn it on in Spark Plugin, a menu will open giving you several customization options.
Let’s run through what they are:
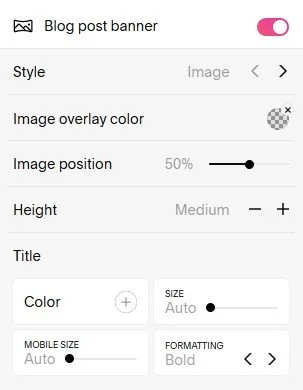
Style
Choose image or color.
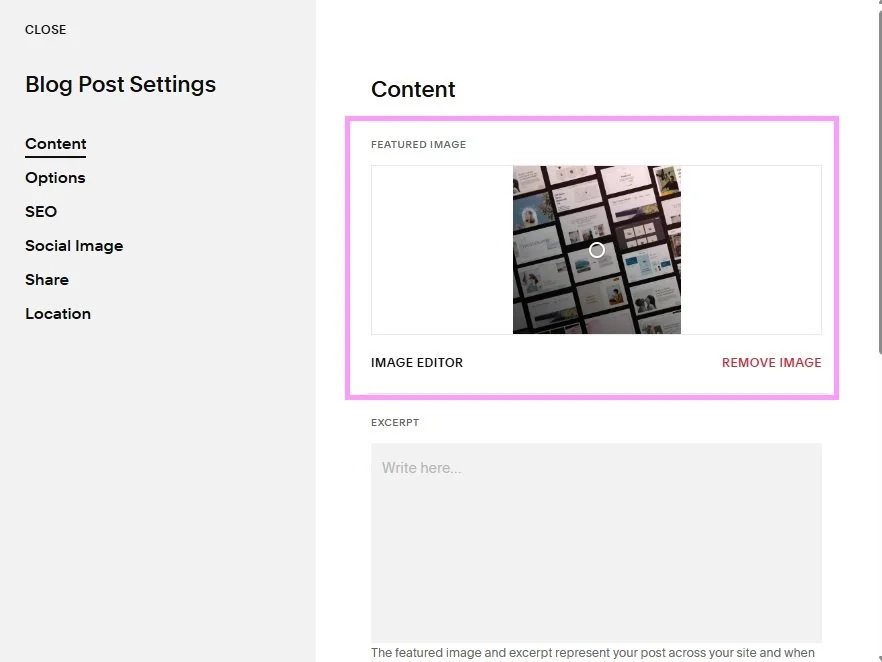
If you choose image, Spark Plugin will add the featured image associated with the blog. You can add or replace this by clicking on the three dots next to the blog to access settings. You’ll then see the featured image in the Content menu.
If you choose color, Spark Plugin will add a plain colored banner.
Image overlay color/background color
If you choose image, add a translucent color overlay to your image.
If you choose background color, select the color you want your background banner to be.
Image position (image only)
Move the slider to change which part of the image appears in the banner.
Height
Choose how much of the page you want your banner to take up.
Title
Choose how you want your blog post title to appear in your banner. This is taken from your blog post headline.
Color: Change the color of your title (default is white)
Size: Change the font size of your title (default is auto)
Mobile size: Change the font size of your title on mobile (default is auto)
Formatting: Change the formatting of your title. Options are normal, bold, italic, underline, and strike
When you’re happy with how your Squarespace blog post banner image looks, click out of the Spark Plugin customization.
Squarespace blog post banner: Frequently asked questions
Can I add a blog post banner to one blog post or customize settings for individual posts?
No, this customization adds a blog post banner to all of your blog posts, and all customizations are universal.
This is a good thing though – you want all your blog posts to be consistent!
Does Spark Plugin offer any other good customizations I can use on my blogs?
Yes, you can access over 100 fantastic customizations that will transform the look and feel of your blog posts.
You can add cool effects to your images and blocks, implement custom text styles, and even animate your links and buttons!
Now you know how to add a Squarespace blog post banner image to your website with Spark Plugin! Spark Plugin comes with a 14-day free trial, so why not give it a try?