How to Redirect an URL in Squarespace (3 Easy Steps)

If you delete or move a page on your Squarespace website, it’s good to know how to carry out an URL redirect.
Not only does this help keep your site organized and your web visitors happy, but it can help improve your search engine presence too!
The good news is that you can set up a Squarespace URL redirect in three simple steps.
How to Redirect an URL in Squarespace
Step 1
First, go to the Home menu, click Settings, and click Developer Tools.
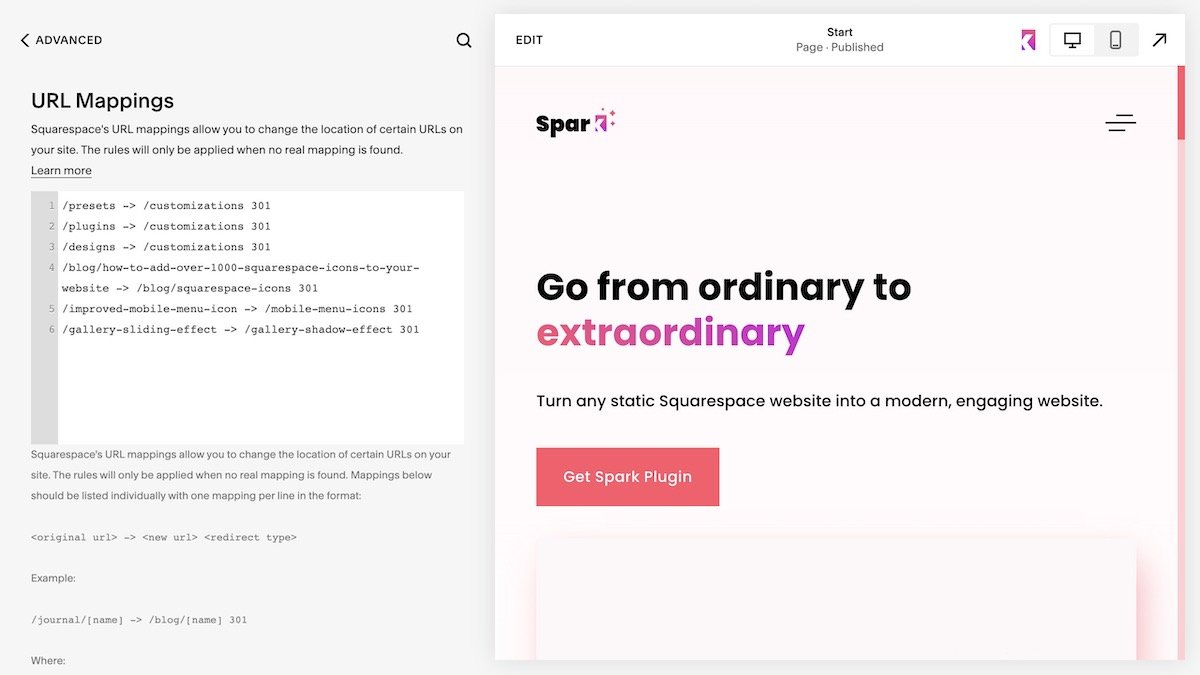
Choose URL Mappings. This section shows all the Squarespace redirects that are currently active on your website.

Step 2
Here you’ll see a text box which you can add your URL redirect. Here you’ll need to enter four different elements:
The URL that needs to be redirected. You don’t have to use the entire website link, just the last part of the address, which is often known as the ‘slug’
An arrow (->)
The URL that you want to redirect to
Whether the redirect is permanent (301) or temporary (302)
Use a 301 redirect if the old URL no longer exists, and use a 302 redirect if you want to temporarily replace a page with another one. For example, if you run a restaurant and want to signpost people to a seasonal menu. This helps search engines like Google understand what to do with your old web page.
So, your URL mapping should look a little like this:
/oldlink -> /newlink 301
Step 3
Finally, click Save and test your new Squarespace URL redirect to make sure it works.
You’re all set!

How to Redirect to an External Site on Squarespace
There may be an occasion where you need to forward a page, or even your whole domain, to another website. You can do this by using the step-by-step guide above.
Instead of entering a link you want to redirect to on your website, you specify a link on another website. So your URL mapping might look like this:
/oldlink -> https://www.brandnewwebsite.com 301
Click Save, and you’re done!
Some Things to Consider With Squarespace Redirects
Here are some things to bear in mind when creating Squarespace URL redirects
You can have about 2,500 redirects in URL Mappings. Regularly audit this section to remove any inactive or unwieldy URLs. For example, if you’re redirecting from page A, to page B, to page C, you might as well just set up a redirect from page A to page C
Your site activates redirects from top to bottom, so redirects at the top of the URL Mappings section will take precedence over lower ones
URL redirects only work if the page you’re redirecting from has been disabled or deleted
If there’s an error in URL Mappings, you’ll see a red error message and won’t be able to save. If this happens, check that your URL mapping contains the four elements mentioned earlier in the article.
Find out more about Squarespace redirects.
And that’s all there is to it! Setting up a Squarespace redirect isn’t as tricky as you might think, and it’s a great way to keep your website in check!