How to Add a Filter to Squarespace (5 Easy Methods)

When you have lots of blog posts, images, or events on your website, how can you help visitors find what they need as quickly as possible?
Adding a smart filter makes it easy for your website visitors to sort and display specific items, increasing the chances of them staying on your site.
While Squarespace doesn’t offer an innate filter mechanism, you can add a filter to any part of your site using Spark Plugin. And best of all, it’s really easy to do!
In this guide, we’ll show you how the Squarespace filter plugin works, and how to set it up on your website.
The takeaway
You can add filters to your Squarespace website with Spark Plugin
Our Squarespace filter plugin allows you to add filters to your portfolio, blog posts, galleries, events, and auto layout sections
Spark Plugin also offers over 100 other customizations to transform the look and feel of your website
How to add the Squarespace universal filter plugin to your website
The good news is that if you have installed Spark Plugin on your website, the Squarespace filter plugin is available to you. You just need to prepare the relevant section of your website and turn the filter plugin on.
Here’s how to add the Squarespace universal filter plugin to different parts of your website.
#1: How to add the Squarespace filter plugin to auto layout sections
Start by adding an auto layout section to your site. You can do this by going to the relevant page and clicking ADD SECTION.
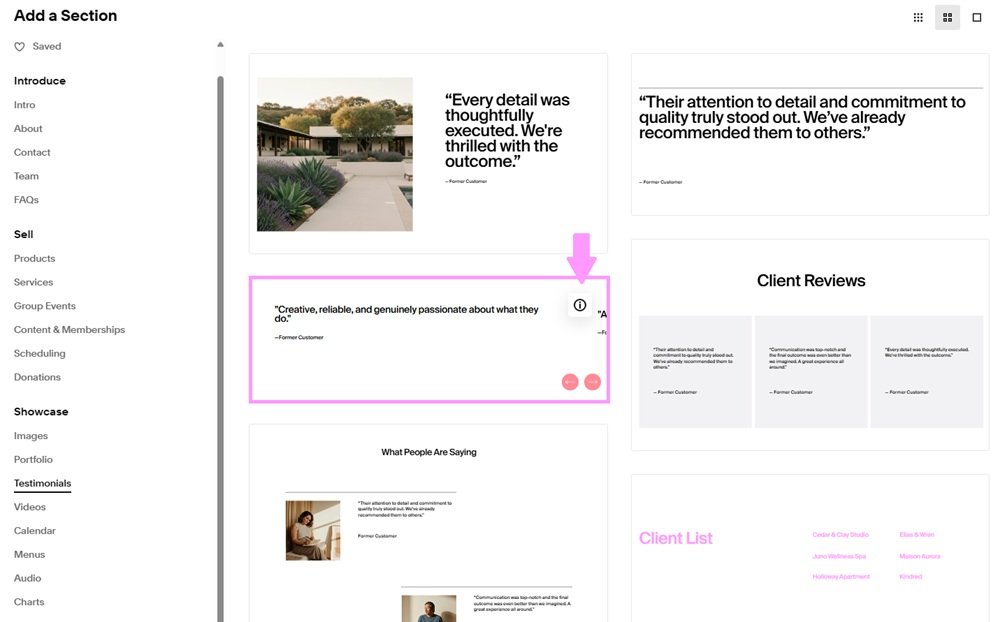
Choose a section with an i in the corner—this signifies that it is an auto layout.
When the auto layout is on your page, click EDIT CONTENT. Go to the Content tab and click each item (you can also add more items if you want.)

Under BUTTON TEXT, add all the applicable categories you want to filter this specific item by, separating them by a comma.
Top tip: Add ‘all’ to every item so everything displays when a customer clicks this button in the filter!
(If the button text isn’t available, go to Elements and switch Show Button from off to on.)
Once you’ve done this for all your items, SAVE your page
We’re now going to enable the Spark Plugin functionality that will add a filter to this section.

Click on the pink Spark Plugin button at the top-right-hand side of your page.
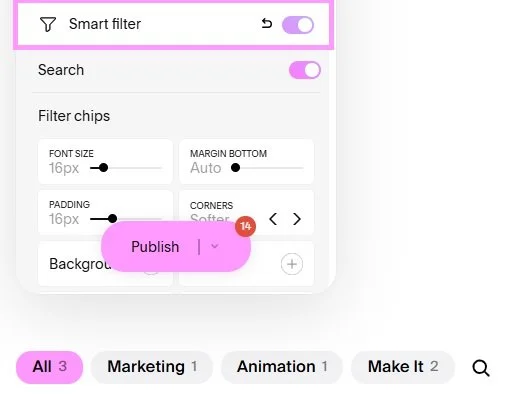
Select your section if you haven’t done so already—it should be highlighted with a pink border. Toggle Smart filter from off to on and your filter should appear!
You can also edit your Squarespace filter plugin to match your website branding, including changing the color, amending the font size, and adding search functionality.
Once you’re happy with your filter, click Publish!
#2: How to add the Squarespace filter to a gallery
Add a gallery section to your page (or you can edit an existing gallery section).
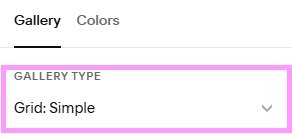
Select EDIT SECTION and make sure your gallery type is Grid:Simple.
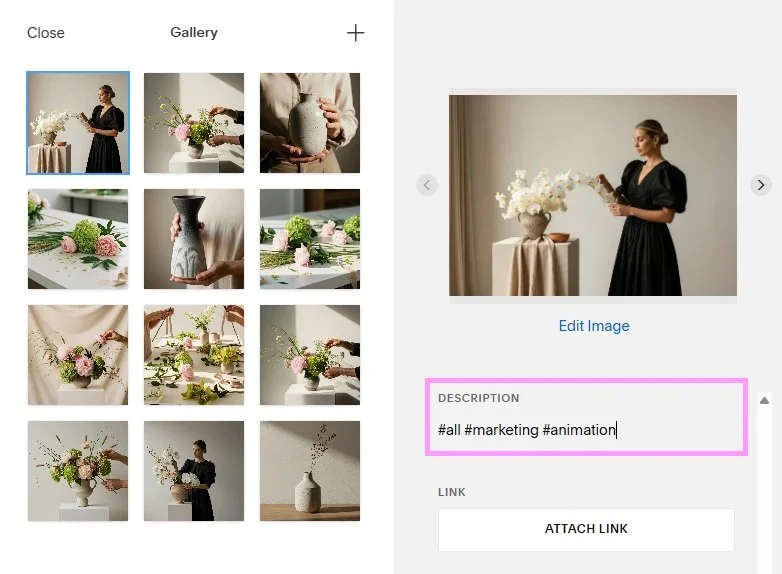
Select EDIT GALLERY and edit/add your images to suit your needs. Then under each image’s description, add hashtags for each category you want to filter your gallery by. Click out of the box when you’re done.
Finally, add the filter functionality and customize your filter as we demonstrated in #1.
#3: How to add the Squarespace filter to blog posts
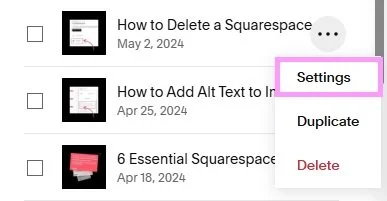
Go to your blog (or create one if you haven’t got one.) Click the three dots (…) on the side of a blog article to enter the settings.
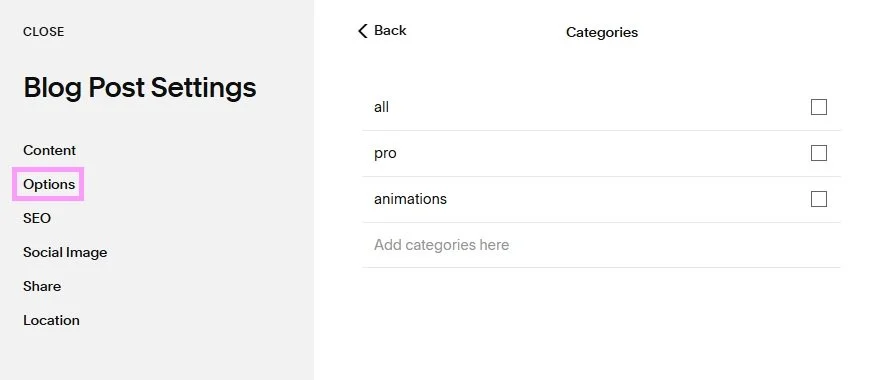
Go to Options and Categories and add the filter categories you want to use. Click CLOSE when you’re done.
Once you’ve added categories to all your articles, add the functionality and customize your filter as we demonstrated in #1.
#4: How to add the Squarespace filter plugin to events
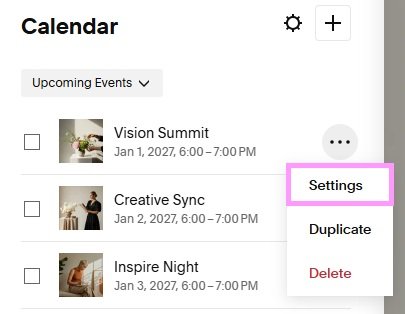
Go to your calendar (or create one if you haven’t got one.) Click the three dots (…) on the side of an individual event to enter the settings.
Go to Options and Categories and add the filter categories you want to use. Click CLOSE when you’re done.
Once you’ve added categories to all your events, add the functionality and customize your filter as we demonstrated in #1.
#5: How to add the Squarespace filter to your portfolio
Go to your portfolio (or create one if you haven’t got one.) Click the three dots (…) on the side of a portfolio element to enter the settings.
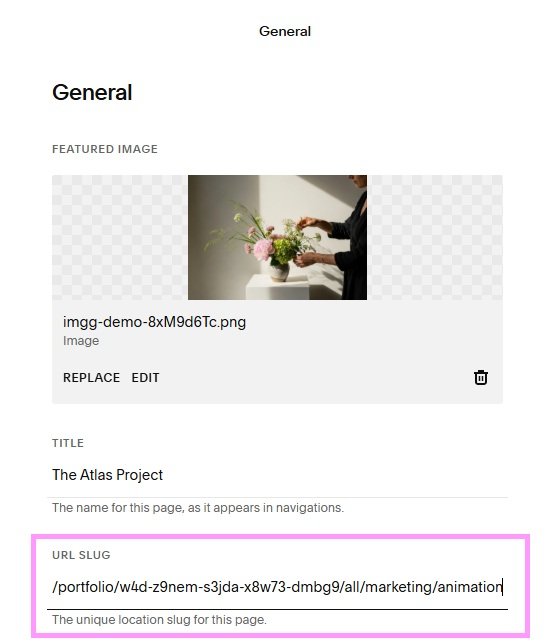
As there isn’t the option to add categories to portfolio elements, you’re going to add your portfolio categories to the URL slug.
Add a forward slash (/) at the end of the existing URL, and separate all the categories you want to use with another forward slash. Click out of the box when you’re done.
Once you’ve added filter categories to your portfolio, add the functionality and customize your filter as we demonstrated in #1.
Squarespace filter plugin: Frequently asked questions
What is a Squarespace filter?
A Squarespace filter allows website visitors to narrow content down by specific criteria, providing them with an additional way of finding relevant information.
What are the benefits of using a Squarespace filter plugin on your website?
A Squarespace filter plugin improves the user experience on your website, making it easier for visitors to search for and find what they need, especially when there’s a lot of information available.
This means visitors are more likely to stay on your site and convert.
How does the Squarespace universal filter by Spark Plugin work?
The Squarespace universal filter works by adding categories, tags, or keywords to the relevant asset on your page. The Squarespace filter plugin identifies these different elements and filters the assets accordingly.
Can I use different styles for each filter on my site?
Yes! As you set up each filter individually, you can customize each filter differently.
How many categories can I use in my filter?
You can have as many filter categories as you need. However, we recommend keeping them to a minimum, as lots of categories may confuse your website visitors and may be harder to keep consistent.
Now you know how to add the Squarespace universal filter plugin to your website, courtesy of Spark Plugin!
Give it a try today and make it easier for your web visitors to find what they need.